
To achieve a Moroccan tile look on a budget, choose intricate stencils made from reusable mylar in vibrant colors like deep blues and reds. Prepare your surface by cleaning, repairing, and priming it for better paint adhesion. Use quality latex or chalk-based paints, and apply with small brushes or foam rollers for clean lines. Carefully secure your stencil and apply thin coats to build the design. For detailed guidance and tips, keep exploring how to create your stunning Moroccan-inspired space.
Key Takeaways
- Use reusable laser-cut mylar stencils with intricate Moroccan motifs for detailed, cost-effective designs.
- Prepare surfaces thoroughly with cleaning, patching, priming, and surface smoothing to ensure clean stencil application.
- Opt for high-quality, vibrant water-based paints and small-nap rollers to achieve professional-looking, budget-friendly results.
- Secure stencils firmly with painter’s tape or spray adhesive and work in small sections for crisp, precise patterns.
- Seal the finished design with a clear water-based polyurethane or floor lacquer to protect and enhance vibrancy.
Choosing the Right Stencil for Moroccan-Inspired Designs
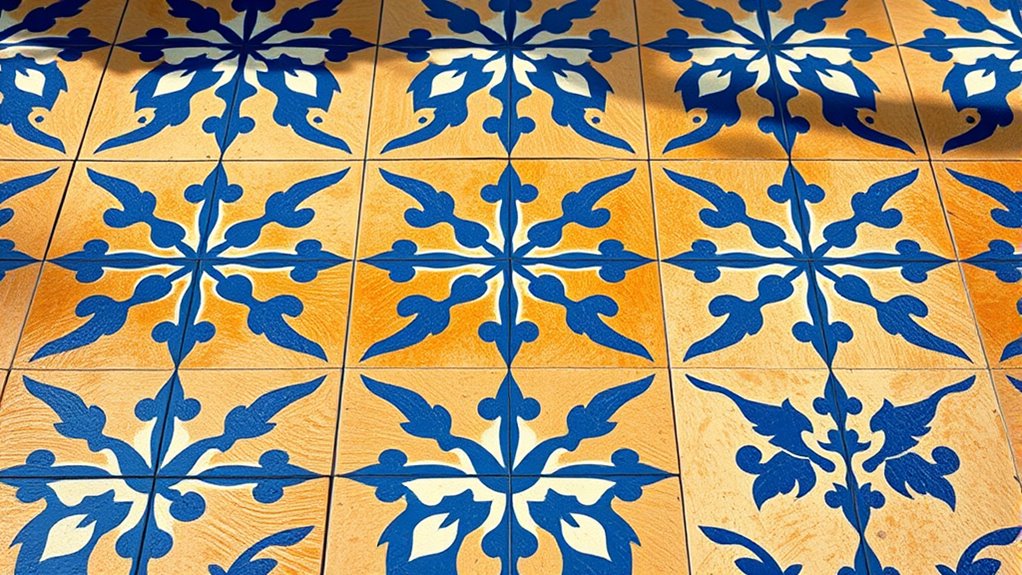
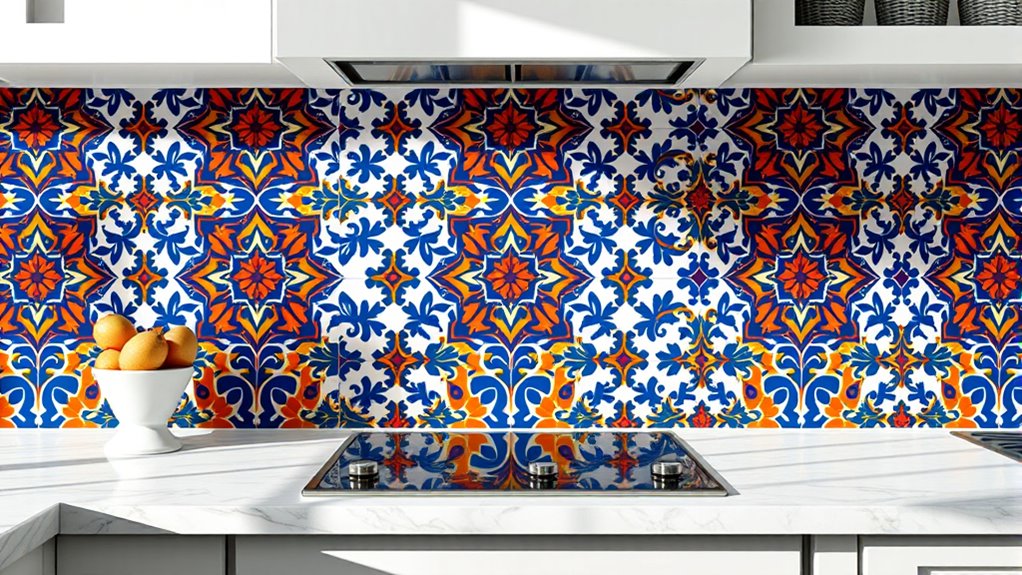
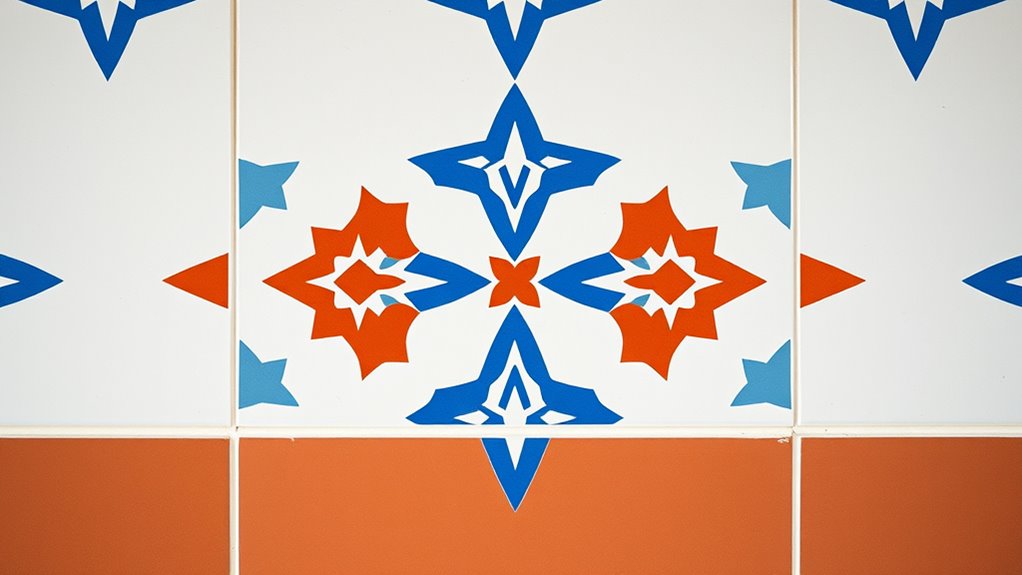
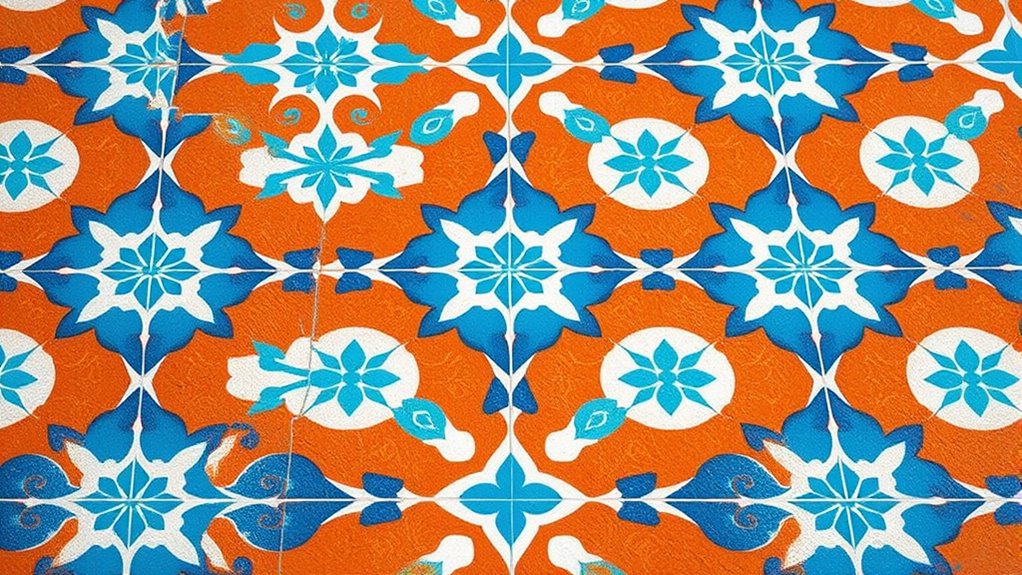
When selecting a stencil for Moroccan-inspired designs, it is vital to focus on intricate motifs that truly capture the traditional aesthetic. Moroccan tile stencils featuring geometric patterns, medallions, or trellises help achieve an authentic look. Moroccan tile patterns often incorporate complex, repeating shapes that are essential for an immersive design. Opt for laser-cut stencils made from reusable mylar, which provide crisp, detailed patterns and durability for multiple projects. Size matters: choose stencils between 12×12 inches and 18×18 inches to guarantee detailed design reproduction and ease of use. Including border and corner pieces in your stencil set allows you to create seamless, continuous Moroccan-inspired patterns across larger surfaces. To bring these designs to life, pair your stencils with vibrant colors like deep blues, rich reds, or metallic accents, emphasizing the bold, lively Moroccan style. Design versatility is essential when selecting stencils, as it allows for greater creativity and adaptation to different surfaces and patterns. Additionally, understanding vetted product options can help you select high-quality stencils that are reliable and durable for your project. Furthermore, considering regional influences can inspire variations that enhance the authenticity of your Moroccan-inspired design. Incorporating quality materials in your stencil choice ensures longevity and precision in your patterns.
Preparing Your Surface for a Flawless Finish
Before you start stenciling, make sure your surface is clean, dry, and free of dust or grease to guarantee even paint application. Apply a primer evenly across the area to promote better adhesion and durability. If you notice any surface imperfections, repair and smooth them out to achieve a flawless finish. Incorporating a surface that allows for proper exfoliation, such as one treated with glycolic acid, can further enhance the smoothness of your surface before painting. Glycolic acid is known for promoting cell turnover and refining skin texture, which can be analogous to preparing surfaces for better paint adherence. Additionally, ensuring your surface has a stable and compatible material composition can prevent issues like paint peeling or bubbling over time. Using appropriate surface preparation techniques can significantly improve the longevity and professional appearance of your stenciled design, especially when considering the influence of technology on artistic expression.
Clean and Dry Surface
To achieve a flawless finish, you need a clean and dry surface. Start by thoroughly cleaning the area with a mild detergent or alcohol-based cleaner to remove dust, grease, and debris. Once clean, allow the surface to dry completely—at least 24 hours—to prevent moisture from causing imperfections. If your surface has rough spots or uneven tiles, use a scraper or sandpaper to smooth them out, creating a uniform base for stenciling. For porous surfaces like cement or unglazed tile, applying a Stix primer can improve adhesion and prevent peeling later. Ensuring your surface is both clean and dry will help your stencil adhere smoothly, giving you a professional-looking finish. Remember, a well-prepared surface is key to a successful project. Silky smooth surfaces can also contribute to a more professional appearance. Additionally, understanding the importance of proper surface preparation can significantly influence your project’s durability and overall look.
Apply Primer Evenly
Applying primer evenly is essential for creating a strong, smooth foundation for your stencil project. Proper surface preparation ensures excellent adhesion and a seamless finish. Use a high-quality, adhesion-promoting primer like Stix, and apply it with a roller or brush in a uniform layer. Make sure the surface is thoroughly cleaned to remove dirt, grease, and debris before priming. Let the primer dry completely—usually 1-2 hours—before evaluating if a second coat is necessary, especially on porous areas. This primer coat acts as a sealing layer, preventing paint bleeding and enhancing stencil accuracy. Achieving an even primer application guarantees a durable, professional-looking result. Additionally, choosing the appropriate primer type, such as an adhesion primer, can significantly improve the durability of your finish. For best results, consider using primer for porous surfaces, which provides better bonding on textured or absorbent materials. Using the right application tools, like a high-quality roller or brush, can also help achieve a more smooth and even finish. Properly applying primer can also help reduce the risk of paint bleeding, leading to cleaner lines in your stenciled design. Furthermore, selecting eco-friendly primers can contribute to more sustainable home improvement projects.
Repair Surface Imperfections
Have you checked your surface for cracks, chips, or other imperfections? Proper surface preparation is essential for a flawless finish. Start by repairing any surface imperfections with patching compounds or fillers to create a smooth, even surface. This step ensures better primer adhesion and prevents flaws from showing through your stencil design. Additionally, ensuring the surface is free of dust and debris can significantly improve adhesion quality. Once repairs are complete, thoroughly clean the area to remove dirt, grease, and loose debris. After cleaning, apply a high-quality primer like Stix, designed for ceramic, tile, or concrete, to improve surface repair and bonding. Allow the primer to dry completely, then lightly sand for surface smoothing, which helps achieve crisp stencil edges. Taking these steps guarantees a professional-looking, durable finish for your Moroccan tile look. Proper surface tuning can also help optimize adhesion and overall finish quality, especially when working with surface preparation techniques recommended for various materials. Incorporating surface testing can further ensure your surface is ready for the decorative coating. For optimal results, consider moisture testing to prevent issues related to trapped moisture that could compromise your finish.
Selecting Paints and Tools for Stenciling Success
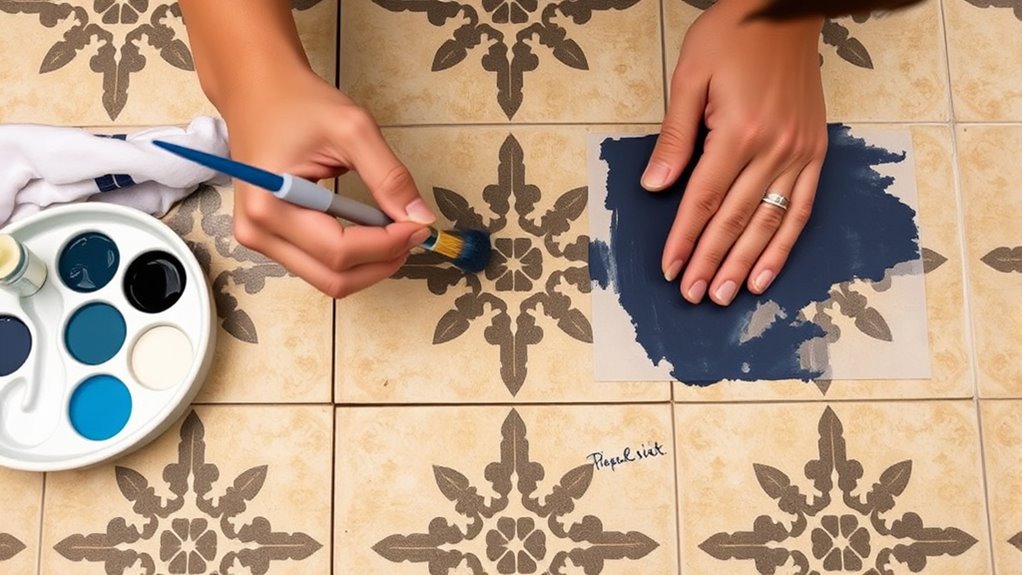
To achieve a crisp, professional look, choosing the right paint and tools is essential. You should opt for high-quality latex or chalk-based paints in vibrant colors, and use a dense brush or foam roller for even application. Selecting the appropriate stencil brushes or sponges will help control paint and prevent bleeding, ensuring your design looks sharp and lasts. Additionally, using proper dilution of paint with water or a medium can help improve adhesion and reduce bleeding around the stencil edges. Incorporating advanced coverage techniques can further enhance the precision of your stenciling project. For added precision, consider using a vetted home theatre projector to visualize your design layout before starting.
Choosing the Right Paint
Choosing the right paint is essential for achieving a professional-looking stencil on your floor or backsplash. Water-based latex or acrylic paints are ideal because they dry quickly, clean up easily, and provide smooth application. For the best finish, opt for matte or eggshell paints, which help prevent glare and give an authentic tile appearance. Use small-nap or foam roller brushes to minimize paint bleed and produce crisp, clean lines. Apply multiple thin coats rather than one thick layer to avoid drips and ensure even coverage. Once your stenciling is complete, seal the design with a clear, water-based polyurethane or floor lacquer. This protective sealer enhances durability and safeguards your work against daily wear and tear, keeping your Moroccan tile look beautiful for years. Ensuring proper air quality during painting can help you achieve a smoother finish and reduce odors. Additionally, working in a space with good ventilation helps dissipate fumes and accelerates drying time, leading to a better overall result.
Essential Stenciling Tools
Selecting the right tools and paints is essential for achieving professional-looking stenciled surfaces. Start with high-quality, water-based latex paints in matte or eggshell finish for a smooth, durable look. Use stenciling tools like stencil brushes, foam rollers, or stencil puffs to guarantee even paint application and reduce bleeding. Secure your stencil firmly with painter’s tape or spray adhesive to prevent shifting and smudging. When applying paint, opt for multiple thin coats instead of one thick layer to create crisp lines and avoid drips. Gently dab paint using a stencil brush or sponge, which gives you better control and minimizes seepage. Investing in the right stenciling tools and paints makes the process easier and results more professional.
Step-by-Step Guide to Applying Your Stencil
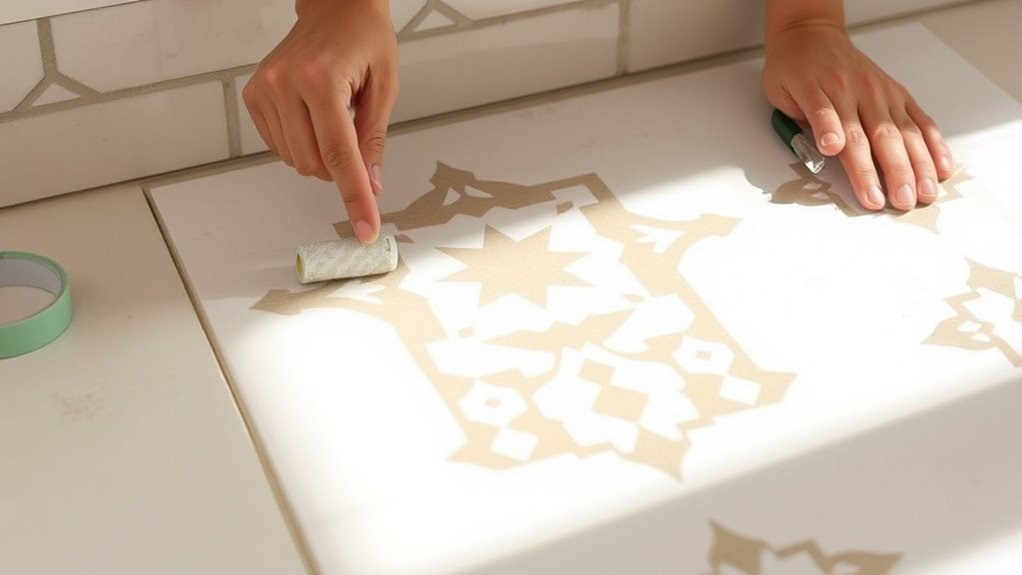
Before you start applying your stencil, make sure the surface is clean and smooth. Proper preparation guarantees your stenciling results are crisp and professional-looking. Position the stencil carefully on your floor or backsplash, securing it with painter’s tape or stencil adhesive to prevent shifting. Use a stencil brush or sponge to dab latex paint, avoiding excess to prevent bleeding. Work in small sections, gradually building up the design with light coats for sharp lines. Remember, patience is key. Once the paint dries, gently remove the stencil and seal your work with a clear topcoat for added durability. Follow these step-by-step tips for a seamless, Moroccan tile-inspired design that’s budget-friendly.
| Step | Action | Tips |
|---|---|---|
| 1 | Clean and sand the surface | Remove debris for smooth paint application |
| 2 | Secure the stencil | Use painter’s tape or adhesive |
| 3 | Apply paint with a stencil brush/sponge | Dab gently, avoid excess paint |
| 4 | Work in small sections | Build design gradually |
| 5 | Remove stencil and seal | Use a topcoat for protection |
Tips for Achieving Realistic and Vibrant Patterns
To make your Moroccan-inspired pattern truly stand out, focus on creating realistic and vibrant designs. Use high-quality latex or chalk paint in bold, lively colors to guarantee your stencil pops. Apply multiple thin coats of painting rather than one thick layer; this prevents bleeding and assures even coverage. To add depth and authenticity, incorporate shading or subtle color variations within the stencil, mimicking the texture of real tiles. Proper sealing with a clear matte or semi-gloss floor sealant enhances durability and helps colors stay vibrant longer. Pay close attention to alignment, using painter’s tape or registration marks to connect stencil sections seamlessly. Accurate alignment and thoughtful shading are key to achieving a convincing, vibrant Moroccan tile look that elevates your space.
Sealing and Maintaining Your Stenciled Floor or Backsplash

Once you’ve completed your stenciled design, applying a clear sealant is essential to protect your work from moisture, stains, and daily wear. Use a water-based polyurethane as a protective coating, which offers durability without harsh fumes. Wait at least 24-48 hours for the paint to fully dry and cure before sealing. Apply multiple thin coats of sealant with a brush or roller, allowing each layer to dry completely for a smooth, long-lasting finish. Regular maintenance is key; reapply the sealant every 1-2 years to preserve the design and enhance durability. To keep your surface looking fresh, clean it with gentle, non-abrasive solutions, avoiding harsh chemicals that could break down the sealant or paint. Proper sealing and maintenance guarantee your Moroccan tile look stays vibrant for years.
Creative Ideas for Customizing Your Moroccan Tile Look

Enhancing your Moroccan tile look is all about adding personal touches and bold design choices. Use Moroccan tile stencils to create a stunning, customized effect on your stenciled tile floor or wall stencil. Incorporate vibrant colors like deep blue or turquoise to mimic authentic tile patterns, making your space lively and inviting. Contrast these with borders or accents in black or white to highlight intricate tile designs. Layer different stencil patterns—geometric shapes with floral motifs—for a unique, personalized touch. Finish with antiquing or distressing techniques, using wax or glaze, to achieve an aged, vintage feel. Remember, you can also experiment with faux tile effects to add depth and character, transforming your space into a Moroccan-inspired haven.
- Use bold colors for visual impact
- Mix contrasting borders and accents
- Layer multiple stencil patterns for depth
- Apply finishing techniques for vintage charm
Frequently Asked Questions
Can You Stencil Floor Tiles?
Yes, you can stencil over existing floor tiles. You’ll want to start by cleaning the surface thoroughly and applying a primer like Stix to guarantee good adhesion. Use high-quality stencils and paint, such as latex or chalk paint, for crisp results. Layering colors and sealing with polyurethane will help make your design durable. With patience and proper technique, you can create a stunning, custom Moroccan tile look without replacing your floors.
Where to Start When Stenciling a Floor?
You might worry about messing up your floor, but starting in the right spot makes all the difference. Begin by thoroughly cleaning the surface, then measure and mark your layout to guarantee symmetry. Secure your stencil firmly with painter’s tape or adhesive spray, and practice your technique on scrap first. When ready, start from a corner or a central point, working outward to keep your design aligned and flawless.
How to Paint a Pattern on Floor Tiles?
To paint a pattern on floor tiles, start by cleaning and priming the surface so paint adheres well. Use painter’s tape to mask off areas you want to keep clear, and carefully measure to align your pattern. Apply thin, even coats of high-quality paint with a brush or roller, letting each dry. Finally, seal your design with a clear protective finish to guarantee it lasts and stays vibrant.
Do Floor Stencils Last?
Your floor stencils can last for years if you take proper care. Using durable materials like 10 mil mylar and sealing the painted surface with polyurethane or floor lacquer helps protect your design from wear and moisture. Make certain the surface is smooth and clean before applying, and avoid harsh chemicals during cleaning. Regular maintenance and high-quality stencils will ensure your stenciled floor stays beautiful and long-lasting.
Conclusion
Now that you know how to create your own Moroccan-inspired floor or backsplash, aren’t you excited to transform your space on a budget? With the right stencil, paints, and a little patience, you can achieve a stunning, authentic look without breaking the bank. So, why wait? Grab your supplies and start stenciling—your dream Moroccan tile design is just a DIY project away!