
To paint terra-cotta tiles effectively, start by cleaning and lightly sanding the surface to guarantee good adhesion. Apply a high-quality primer designed for ceramics, following the manufacturer’s instructions. Use durable, water-based tile paint and work in thin, even coats, allowing each to dry thoroughly. Seal the finished surface with a clear topcoat to protect against moisture and scratches. For detailed tips on achieving a smooth, long-lasting finish, keep exploring the best techniques.
Key Takeaways
- Clean and lightly sand terra-cotta tiles to ensure proper adhesion before painting.
- Use a high-quality primer suitable for porous surfaces to improve paint adhesion.
- Apply durable acrylic or epoxy-based paint in thin, even coats for a smooth finish.
- Pay attention to edges and corners, using a fine brush for complete coverage.
- Seal the painted tiles with a clear topcoat to protect against stains, moisture, and wear.
Painting terra-cotta tiles is an effective way to refresh their appearance and add a personalized touch to your space. Whether you’re aiming for a subtle update or a bold new look, choosing the right colors and applying them correctly can make all the difference. When it comes to color matching, consider the overall style and color scheme of your room. You want your new tile color to complement existing decor or create the desired contrast. Take samples of your existing palette and hold them up to the tiles to see how different shades interact. This will help you narrow down your choices and ensure your finished project looks cohesive. Once you’ve selected your color, focus on application techniques that will give you a professional finish. Properly preparing the tiles is essential—clean thoroughly to remove dirt, grease, and any previous finishes that might interfere with paint adhesion. Lightly sanding the surface can also help improve grip, especially if the tiles are glossy or smooth.
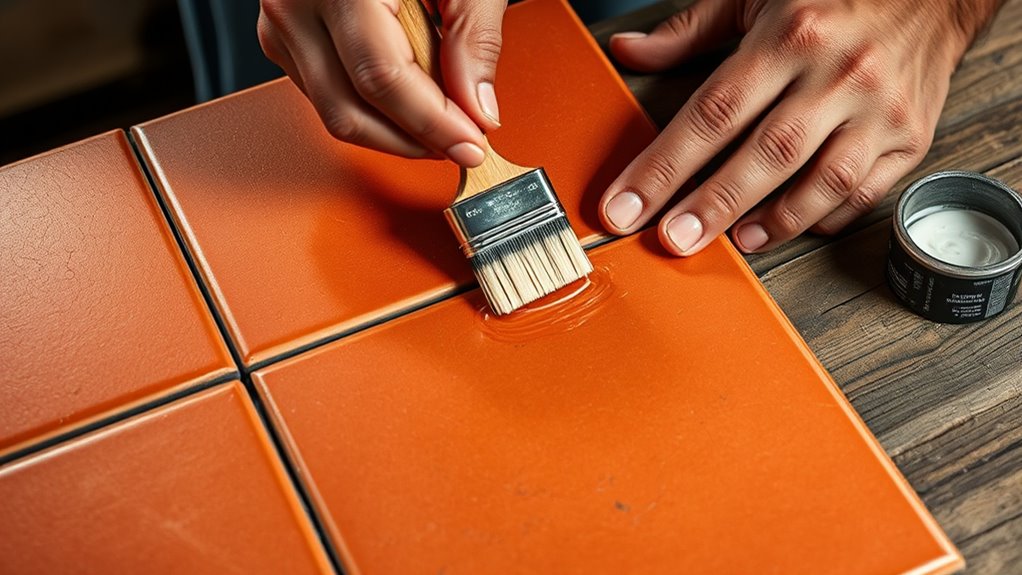
When it’s time to apply paint, use a high-quality primer designed for ceramic or porous surfaces. Priming ensures even coverage, enhances color vibrancy, and prolongs your paint’s lifespan. Follow the manufacturer’s instructions carefully; some primers may require multiple coats or drying time before painting. After priming, select a suitable paint—preferably a durable acrylic or epoxy-based paint formulated for tiles. Using application techniques like a high-density foam roller or a fine brush can give you a smooth, even finish. Be mindful to work in thin, even coats, allowing each layer to dry thoroughly before applying the next. This prevents drips, uneven color, and brush marks, resulting in a more professional look.
As you paint, pay attention to detail, especially around edges and corners, to ensure complete coverage without streaks. For larger areas, back-roll with a roller to maintain consistency in texture and color. Once your final coat has dried completely, consider sealing the painted surface with a clear, protective topcoat to guard against stains, scratches, and moisture. This extra step extends the life of your work and keeps your tiles looking fresh longer. Additionally, understanding the importance of contrast ratio can help you choose colors that will pop and look vibrant under different lighting conditions. By combining careful color matching and precise application techniques, you can transform your terra-cotta tiles into a stunning feature that reflects your personal style. With patience and attention to detail, your tiles will look vibrant, refreshed, and beautifully integrated into your space.
Amazon Product B08KT3TZFT
As an affiliate, we earn on qualifying purchases.
Frequently Asked Questions
How Long Does Painted Terra-Cotta Tile Typically Last?
Painted terra-cotta tiles can last 5 to 10 years, depending on your tile’s durability and how well you maintain it. Proper prep, primer, and sealing can extend paint longevity, making your tiles look fresh longer. Keep in mind that high-traffic areas or exposure to moisture may shorten their lifespan. Regular cleaning and touch-ups help preserve their appearance, ensuring your painted tiles stay vibrant and protected for years to come.
Can I Use Waterproof Sealant on Painted Terra-Cotta Tiles?
Your painted terra-cotta tiles are vulnerable to destruction from water—using a waterproof sealant is like armor for your surface! Check sealant compatibility first; not all sealants work well with paint. For outdoor areas, consider weatherproofing to prevent damage from rain and sun. If you choose the right sealant, it’ll protect your tiles while maintaining their beauty, ensuring your efforts last for years without worry.
Is There a Specific Type of Paint Best for Outdoor Terra-Cotta Tiles?
For outdoor terra-cotta tiles, you should choose a paint designed for exterior use that offers excellent outdoor durability and paint adhesion. Look for acrylic or latex-based paints labeled for masonry or tile surfaces, as they withstand weather changes and prevent peeling. These types of paint bond well to the tile surface, maintaining their color and finish over time, even in varying outdoor conditions.
How Do I Remove Paint if I Want to Change the Design Later?
Think of your painted terra-cotta tiles as a fresh canvas waiting for a new masterpiece. To remove paint, you can try gentle paint removal techniques like using a heat gun or a plastic scraper, avoiding damage to the tile surface. For stubborn spots, apply a mild solvent or paint stripper, then sand lightly. Repainting tips include cleaning thoroughly and re-priming for a smooth finish, so your next design can shine just as brightly.
Are There Eco-Friendly Paint Options Suitable for Terra-Cotta Tiles?
You can choose eco-friendly paints for your terra-cotta tiles by looking for options with natural pigments and low or zero VOCs. These paints are safer for the environment and healthier for your home. Natural pigments provide vibrant colors without synthetic chemicals. Always check labels for eco certifications to guarantee you’re using sustainable, non-toxic products that protect both the planet and your living space.
Amazon Product B0CCVPTNLM
As an affiliate, we earn on qualifying purchases.
Conclusion
By carefully preparing, priming, and protecting your terra-cotta tiles, you’re gently guiding them into a fresh chapter. With patience and attention, you’re giving their timeless charm a subtle renewal, allowing their beauty to softly shine through. Remember, a well-loved surface can quietly tell a story of renewal and care. Embrace the process, and watch your space transform into a warm, inviting haven that feels both new and treasured.
Amazon Product B0GG9C164R
As an affiliate, we earn on qualifying purchases.
Amazon Product B0FY6JH3KB
As an affiliate, we earn on qualifying purchases.