
To repurpose an old door into a rustic headboard, start by choosing a door with character or charming details. Clean, sand, and repair it as needed before painting with chalk or milk paint for an authentic vintage look. Attach hardware or brackets to mount it securely to the wall or bed frame, using level measurements. Finish with a protective seal and consider adding distressed touches. For step-by-step guidance and creative tips, explore more to make your project truly unique.
Key Takeaways
- Select an interesting, weathered door with rustic charm that fits your bedroom space.
- Prepare the door by cleaning, repairing, and sanding for a smooth, paint-ready surface.
- Choose and install appropriate hardware to mount the door securely as a headboard.
- Paint with chalk or milk paint in thin coats, then distress and seal for an authentic rustic look.
- Mount the finished headboard onto the bed or wall, ensuring stability and proper positioning.
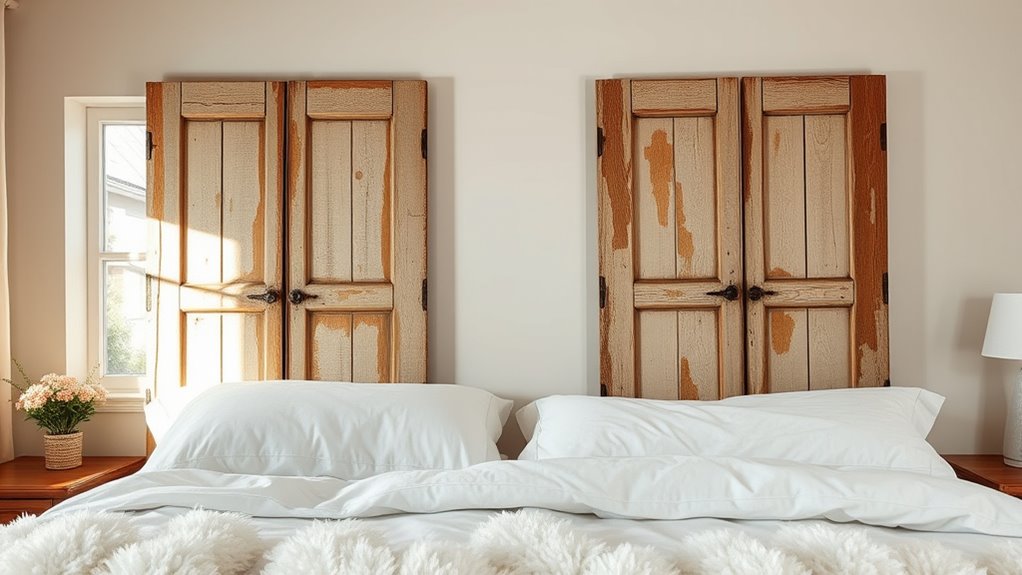
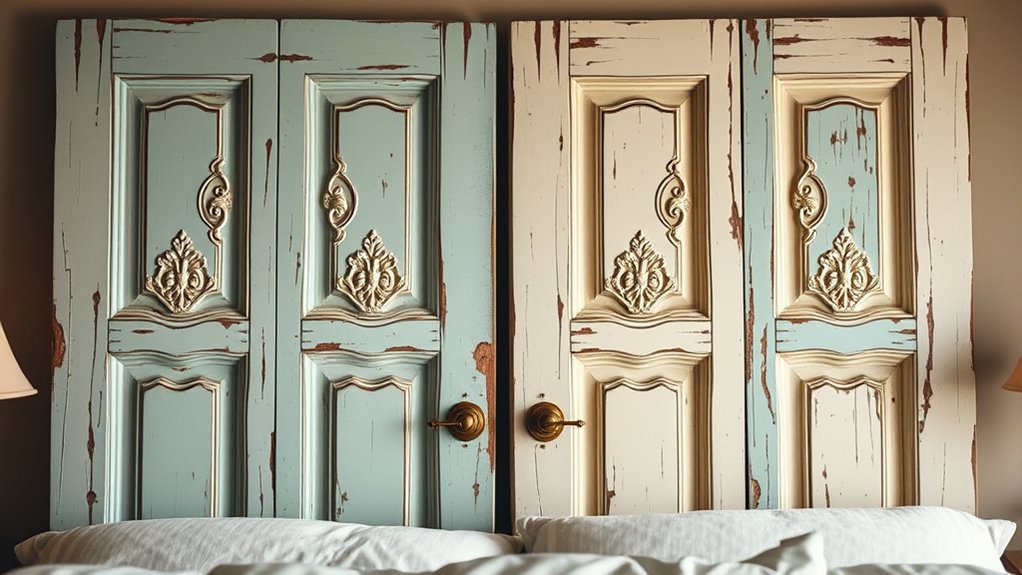
If you’re looking for a unique way to add character to your bedroom, repurposing old doors into rustic headboards is a fantastic option. It’s a project that combines creativity with practicality, transforming something often discarded into a stunning focal point. The process starts with selecting the right door, ideally one with interesting details or weathered charm that enhances your rustic aesthetic. Once you find the perfect piece, the next step is preparing it for a new life as a headboard.
Preparation involves cleaning the door thoroughly to remove dust, dirt, and any loose paint or debris. You’ll want to inspect it for any damages or loose hardware, addressing these issues early on. Sanding is essential, especially if the door has a glossy or rough surface, as it helps create a smooth base for painting and prevents splinters. Use medium-grit sandpaper and work evenly, paying attention to edges and details. After sanding, wipe down the surface with a damp cloth to remove dust, ensuring your painting will adhere properly. Incorporating high-quality content enhances your project’s credibility and provides valuable insights for DIY enthusiasts.
Thoroughly clean and inspect the door, then sand evenly to create a smooth, splinter-free surface for painting.
When it comes to hardware installation, you’ll need to decide how to attach the headboard to your bed frame. Most DIY enthusiasts opt for a straightforward method: drilling brackets or mounting strips directly onto the back of the door. Measure carefully to guarantee the hardware is centered and level, then mark your drill points. Use a drill with appropriate bits for your wall type and hardware. Secure the brackets firmly, and double-check their stability. If you prefer a more permanent installation, you might attach cleats or mounting boards to the wall, then hang the door on these supports. This method not only guarantees stability but also allows for easy removal or repositioning in the future.
Painting techniques are vital to achieve a rustic look that’s both charming and durable. Start with a primer if the door has a dark or glossy finish; this helps the paint adhere better and enhances the final look. For a distressed or weathered appearance, consider using chalk paint or milk paint, which are easy to work with and lend an authentic vintage feel. Apply the paint in thin, even coats, allowing each layer to dry completely before adding the next. To enhance the rustic charm, use techniques like dry brushing or sanding lightly over painted areas to reveal glimpses of the underlying wood or previous paint layers. This adds depth and character, making your headboard truly one-of-a-kind. Once the paint dries, seal it with a clear matte or satin finish to protect your work from everyday wear and tear.
With hardware installed and your painting techniques complete, you’re ready to mount your custom rustic headboard. The result will be a stunning, personalized piece that adds warmth and personality to your bedroom, all while giving new life to an old door. Remember, holistic SEO practices like optimizing your project’s online content can help others find your creative ideas and inspire more DIY furniture transformations.

Paoeyrb 4 Pcs Bed Rail Brackets with 32 Pcs Srews, High Quality Bed Frame Brackets, Rust Proof Bed Frame Hardware for Headboards, Footboards, Wood Bed Frame
【HIGH QUALITY MATERIALS】The bed rail brackets is made of galvanized material,which is rust-proof and has a thicker iron…
As an affiliate, we earn on qualifying purchases.
As an affiliate, we earn on qualifying purchases.
Frequently Asked Questions
What Safety Precautions Should I Take During the Project?
When working on your project, safety should come first. Make sure you wear proper safety gear, like gloves and eye protection, to prevent injuries. Keep your workspace safe by clearing clutter and working in a well-ventilated area. Use tools carefully and follow their instructions. Taking these precautions helps prevent accidents and keeps your workspace safe, so you can enjoy your project without worry.
How Do I Choose the Right Door for a Headboard?
Imagine you’re in a vintage shop, picking out a gem—your ideal door. To choose the right one, consider the door material; solid wood offers durability, while hollow core is lighter but less sturdy. Also, check the door size—ensure it’s proportionate to your bed frame for a balanced look. Pick a door with a style that complements your decor, and measure carefully before making your selection.
Can I Customize the Paint or Finish Easily?
Yes, you can easily customize the paint and finish options to match your style. You could choose from various paint customization techniques like chalk paint, distressing, or even adding stencils for a unique look. Finishes like matte, gloss, or satin are simple to apply with the right brushes or rollers. Just prep the door properly, and you’re free to experiment with different paint customization ideas to achieve your desired rustic headboard.
What Tools Are Necessary for Cutting and Sanding?
To cut and sand your old door, you’ll need essential power tools like a circular saw or jigsaw for cutting, and an orbital sander for smoothing surfaces. Make sure to follow proper sanding techniques, starting with coarse grit and gradually moving to finer ones for a polished finish. Wearing safety gear like goggles and dust masks is vital, and always work with controlled, steady motions to achieve the best results.
How Do I Attach the Headboard to the Bed Frame Securely?
To attach your headboard securely, start by positioning it against your bed frame. Use mounting brackets to anchor the headboard to the frame, ensuring stability. Reinforcing screws will provide extra support; drill them through the brackets into the frame for a tight fit. Make sure everything aligns properly before tightening everything fully. This method keeps your headboard stable and secure, preventing any wobbling or shifting over time.

Rust-Oleum Linen White Chalked All-in-One Ultra Matte Paint | One Coat Coverage | No Primer, Sanding, Or Topcoat Needed | Easy Clean Up | Made in USA | 30 OZ
EASY TO USE, EVEN FOR BEGINNERS: Whether you’re new to DIY or a pro, Rust-Oleum Chalked makes painting…
As an affiliate, we earn on qualifying purchases.
As an affiliate, we earn on qualifying purchases.
Conclusion
By transforming old doors into rustic headboards, you’re not just upcycling furniture—you’re creating a jaw-dropping centerpiece that could turn your bedroom into the most talked-about space in the universe. Imagine the compliments, the envy, and the endless admiration your masterpiece will garner. With just a little creativity and effort, you’ll have crafted a headboard so stunning, it might just outshine the stars themselves. Get ready to impress everyone—and yourself—by turning something old into something truly extraordinary!

3M Aluminum Oxide Sandpaper, 5 Sheets, Assorted Grit 100-150-220, 9-in x 11-in, Multi-Purpose Abrasive Sanding Paper, For General Purpose Sanding On Paint, Wood and Metal (9005NA)
Use it by hand, on a sanding block, or cut it to size for a power tool sander
As an affiliate, we earn on qualifying purchases.
As an affiliate, we earn on qualifying purchases.

2 Pcs Bed Frame Brackets Adapter for Headboard Extra, Heavy Duty Bed Modification Plate, Headboard Attachment Bracket with Hardware
The bed frame brackets adapter perfect for full (double) to queen conversions
As an affiliate, we earn on qualifying purchases.
As an affiliate, we earn on qualifying purchases.