
To upgrade your fixtures with boho pendant lamps, start by selecting one that suits your space, using natural materials like rattan and warm finishes like brass. Turn off power, safely remove your old fixture, then connect the new pendant, ensuring it’s level and secure. Adjust the cord length for the desired height and verify all wiring is tight and grounded. Keep these steps in mind, and you’ll be able to upgrade confidently—there’s more to discover for a perfect finish.
Key Takeaways
- Choose a boho pendant light that complements your space with natural materials, warm finishes, and appropriate size for your area.
- Turn off power at the circuit breaker and verify no current before removing the existing fixture.
- Safely disconnect wiring, supporting the fixture during removal, and inspect hardware for compatibility with the new pendant.
- Mount the new pendant securely, connect wiring correctly (black to black, white to white, ground to ground), and adjust height and level.
- Test the installation, ensure all connections are secure, and clean the fixture for a polished, boho-inspired look.
Top picks for "upgrad light fixtur"
Open Amazon search results for this keyword.
As an affiliate, we earn on qualifying purchases.
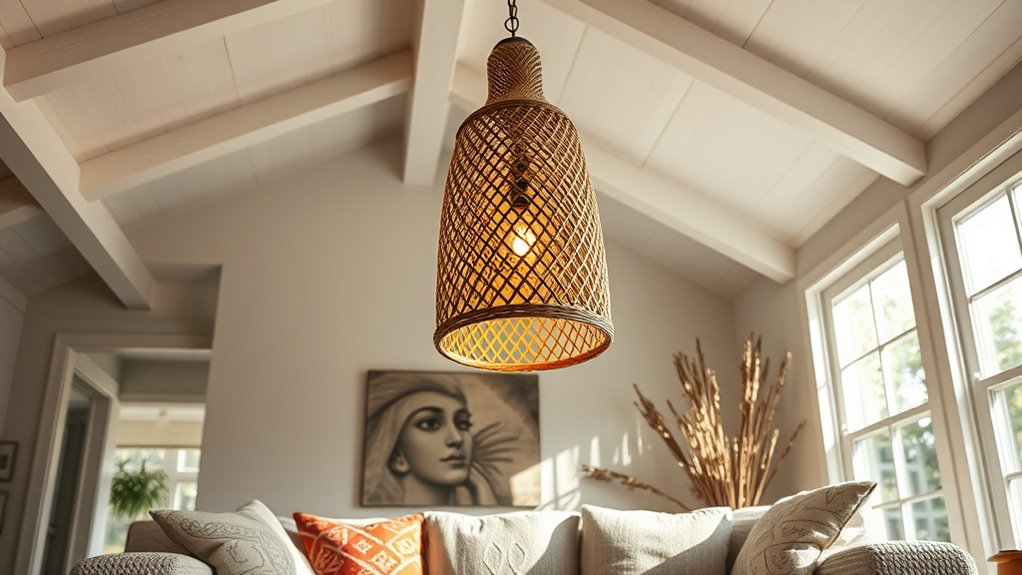
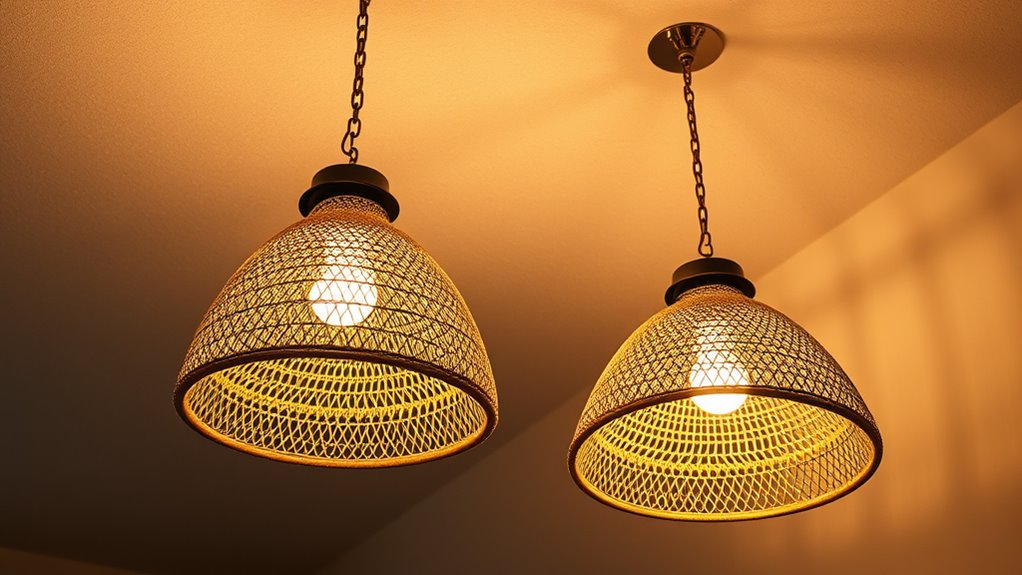
Selecting the Perfect Boho Pendant Light for Your Space
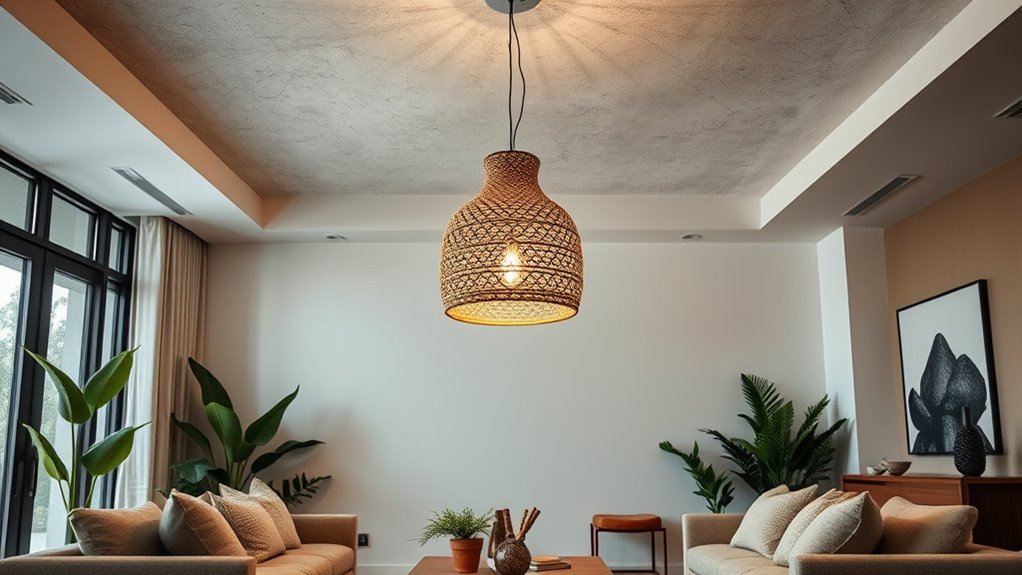
To select the perfect boho pendant light for your space, start by considering natural materials like rattan, wicker, or jute, which instantly add texture and warmth to your decor. Your lighting design should complement these materials with warm-toned finishes such as brass, matte black, or antique gold to enhance the boho vibe. Think about the size of the fixture—larger pendants work well above kitchen islands, while smaller ones suit cozy corners or side tables. You can also create visual interest with multi-pendant or cluster arrangements, adding layered depth to your space. Finally, make sure the pendant’s wiring and socket are compatible with your existing electrical setup for an easy, hassle-free installation. This approach will help you craft a cohesive, inviting boho aesthetic.
Preparing Your Existing Fixture for a Stylish Upgrade

Before starting your upgrade, make sure to turn off the power at the circuit breaker to stay safe. Next, remove the existing shade and check that the fixture’s wiring and mounting hardware are in good condition and compatible with your new pendant. Once these steps are complete, you’ll be ready to prepare your fixture for its stylish transformation. Ensuring your circuit safety measures are in place is essential for a smooth upgrade process. Additionally, inspecting the lighting fixture’s wiring for any signs of wear or damage can prevent potential issues during installation. Verifying that your fixture’s wiring and hardware are suitable for the new pendant will help ensure a secure and successful upgrade. Considering the rustic charm of farmhouse aesthetics can guide your choice of pendant styles for a cohesive look. Incorporating industry trends can also help you select a pendant that complements current interior design styles.
Turn Off Power
Turning off the power is the essential first step before working on your light fixture. To do this, you must turn off the circuit breaker supplying power to the fixture to prevent electrical shock. Always confirm the power is off by testing the fixture with a voltage tester or multimeter before proceeding. If the fixture was recently on, wait for it to cool down, especially if it has incandescent bulbs that generate heat. Next, remove the bulb and glass cover to access the wiring and mounting hardware safely. Use insulated tools to loosen screws and disconnect wires, ensuring you don’t contact live electrical parts. Checking the electrical system beforehand ensures your safety as you prepare for the upgrade, making the process smoother and risk-free. Additionally, understanding city electrical codes can help ensure your upgrade complies with safety standards and avoids potential issues. Being familiar with local electrical regulations can also prevent costly violations and ensure proper installation standards. Verifying the electrical connections can help identify any existing issues before installation, and consulting professional electricians when in doubt can further enhance safety and compliance.
Remove Existing Shade
Start by carefully removing the existing shade or cover from your fixture. Turn off the power at the circuit breaker first. Then, use a screwdriver or pliers to loosen and detach any screws, clips, or hardware securing the shade. Gently lift or slide the cover away from the fixture, being cautious not to damage surrounding parts or wiring. If your fixture has a glass cover or decorative elements, set them aside for reuse or replacement. Take a close look at the fixture’s hardware to make sure it’s secure and in good condition for your new boho pendant lamp. Removing the old shade is an essential step in preparing your lighting fixture for a stylish upgrade, making way for your new pendant lamp to shine. Additionally, inspecting the fixture’s hardware for secure attachment ensures it can safely support the new pendant lamp, especially considering fabric decorating markers or other decorative elements that might be added later. Being aware of the light fixture components can help you identify any potential issues before installing your new boho pendant lamp. Consulting the relationships between fixture parts and their proper assembly can prevent future problems and ensure a safe installation. Checking the toilet size and dimensions can also help you confirm that the new fixture will fit properly in your space, ensuring a seamless upgrade.
Check Fixture Compatibility
To guarantee your existing fixture is ready for a stylish upgrade with a boho pendant lamp, you need to verify its compatibility. First, check that your fixture has a standard octagon box and compatible wiring to support the new fixture. Ensure the fixture’s weight is within the pendant lamp’s recommended load capacity to avoid strain on the mounting hardware. Confirm that the ceiling wiring includes a grounded (bare or green) wire, which is essential for safety. Remove any glass covers or globes, and inspect the electrical connections to make sure they’re in good condition. Additionally, verifying that your fixture aligns with the current sector performance metrics can help ensure a smooth upgrade process. Checking that your fixture is compatible with herbal infusion machines and tools can also be beneficial if you’re considering integrating smart home features or modern updates. Finally, measure the height and clearance of your current fixture to determine if the pendant’s length and installation method will fit your space. Proper fixture compatibility guarantees a safe, stylish upgrade. Additionally, reviewing the best vacuums for hardwood floors can help keep your space tidy during your decor updates. For added safety, consult local electrical codes and installation guidelines to ensure your upgrade is compliant and secure.
Safely Removing Old Lighting Components

Before removing your old fixture, make sure to turn off the power at the circuit breaker to prevent shocks. Use a voltage tester to confirm the wires are no longer live before touching them. Carefully detach the fixture, supporting it as you unscrew and disconnect the wiring. Additionally, consider sustainable materials used in lighting fixtures to ensure an eco-friendly upgrade. Choosing fixtures with eco-friendly features can help minimize environmental impact and promote sustainability. Incorporating security zone info principles can also help safeguard your home during renovation projects. To further enhance safety, consider upgrading to fixtures with smart technology that can monitor and alert you to electrical issues during installation.
Turn Off Power
Always turn off the circuit breaker before beginning any work on your light fixture to guarantee safety. Turning off power ensures you won’t get shocked while working on the wiring. After switching off the breaker, confirm the power is off by testing the fixture with a voltage tester or a non-contact tester. This step is vital, even if you believe the switch is off. Remove the light bulb and glass cover to access the mounting screws and wiring connections safely. Carefully unscrew and disconnect the fixture’s mounting bracket or canopy from the electrical box. Once the fixture is removed, double-check that no power is present by testing the wires again. Turning off power at the breaker is an essential step before proceeding to remove or replace your light fixture. Understanding electrical safety protocols can help prevent accidents during DIY projects. Additionally, familiarizing yourself with proper wiring techniques can ensure your new fixture is installed correctly and safely. Incorporating safe work practices helps minimize risks associated with electrical work.
Remove Fixture Safely
Make certain the power is off at the circuit breaker before you start removing the fixture. This step is vital to prevent electrical shock. Use a ladder or stable step stool to reach the ceiling fixture safely, ensuring you have good balance and clear access. Start by removing any screws or mounting hardware securing the fixture to the ceiling, keeping track of small parts. Carefully disconnect the wiring by twisting apart wire connectors or unscrewing terminal screws, making note of how the wires connect for reassembly. Support the fixture with one hand while gently detaching it from the ceiling mount to avoid dropping or damaging it. Once the fixture is free, set it aside carefully, and double-check that the power remains off before proceeding to install the new lighting.
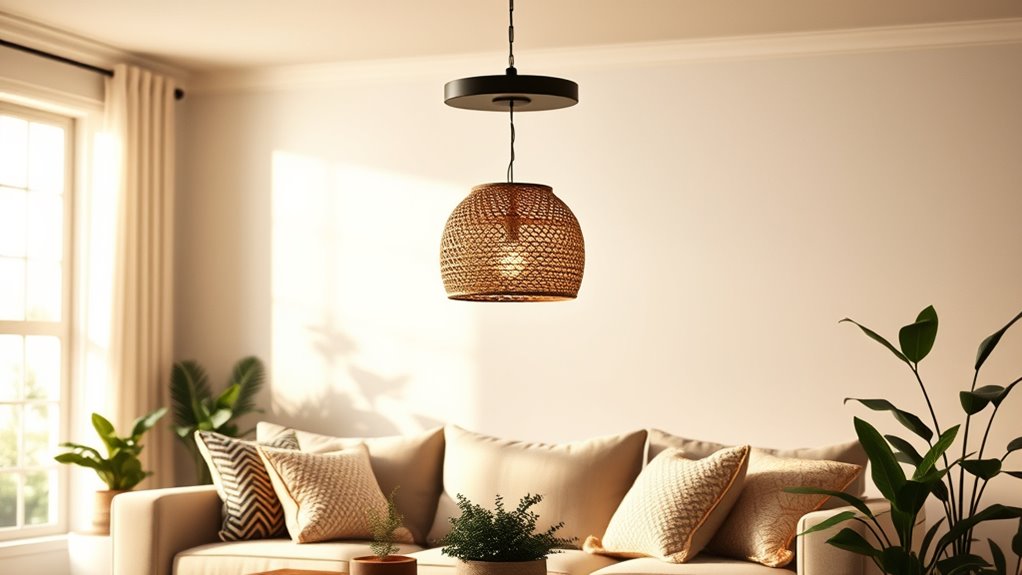
Connecting and Mounting Your New Pendant Fixture

To connect and mount your new pendant fixture, start by turning off the power at the breaker and carefully removing the old fixture, noting how the wires are connected. When installing your new light, make sure the wiring matches the new light fixtures’ connections—typically black to black, white to white, and ground to ground. If you’re replacing a builder grade fixture, you can often do this without rewiring, just attaching the new pendant light to the existing wiring. Secure the mounting bracket to the electrical box, ensuring it’s level for the perfect look. Choose different types of pendants to create a whole new vibe, whether spray painted or in their original finish. Make sure to install the right light bulb and adjust the cord length for your ideal lighting ideas and desired ambiance.
Ensuring Proper Leveling and Secure Attachment
Before finalizing your pendant fixture installation, it’s essential to verify that it hangs evenly and securely. Use a level to check side-to-side and front-to-back alignment before tightening all mounting screws and hardware. Adjust the fixture’s length by selecting the correct rod or chain links so it hangs at the desired height, typically around 6 feet from the floor. Ensure the canopy sits flush against the ceiling surface by making any necessary adjustments to eliminate gaps or tilt. Securely tighten all connections to prevent wobbling or shifting over time. Double-check that the fixture is properly grounded, and confirm all wiring connections are tight and insulated. Proper leveling and secure attachment guarantee your boho pendant lamp not only looks great but also stays safe and stable.
Styling Tips to Complement Your Boho Pendant
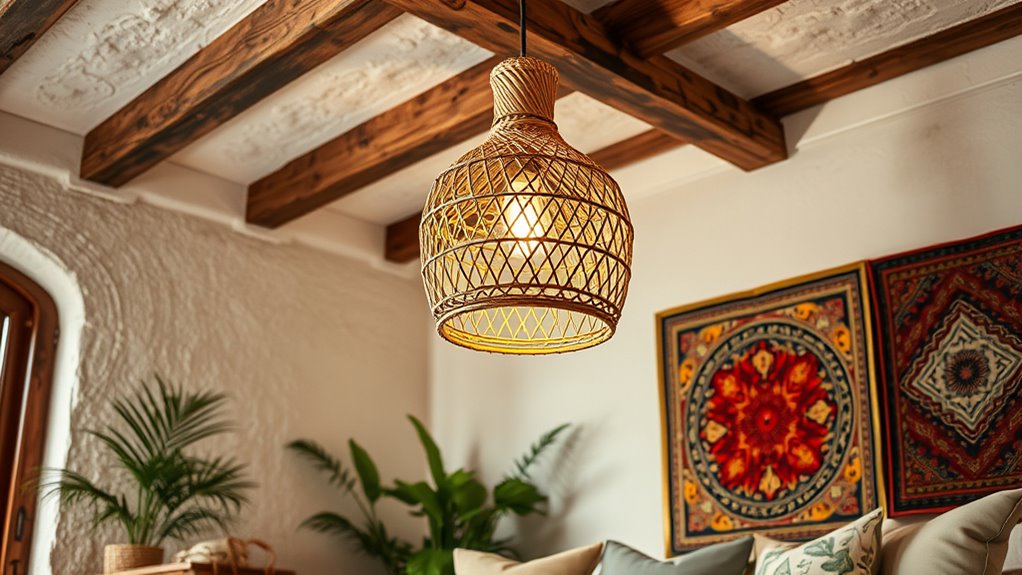
Adding the right styling elements can elevate your boho pendant and create a cohesive, relaxed space. Incorporate natural materials like rattan, wicker, or jute in your pendant shade to boost the boho vibe. Use warm, earthy colors such as terracotta, blush, or muted greens to complement the fixture. Hang your pendant at varied heights in a cluster or staggered pattern for visual interest and a laid-back feel. Pair it with eclectic decor like macramé wall hangings or vintage textiles to enhance the style. Choose fixtures with textured or woven shades to add dimension and soften the light, creating a cozy, bohemian atmosphere.
| Material | Color Palette | Arrangement |
|---|---|---|
| Rattan | Terracotta | Varying heights |
| Wicker | Muted greens | Clustered |
| Jute | Blush | Staggered |
| Macramé | Earth tones | Eclectic decor |
| Woven Shades | Warm hues | Soft lighting |
Final Checks and Enjoying Your Updated Room
Once you’ve installed your new boho pendant fixture, it’s vital to perform final checks to guarantee everything is safe and looks perfect. First, ensure all wiring connections are secure, insulated, and properly grounded before turning the power back on. Verify that the pendant lamp is level and positioned at the desired height for aesthetic balance. Install the recommended bulbs, following the manufacturer’s wattage guidelines to avoid overheating. Turn on the light to confirm it functions correctly and provides even illumination across the room. Finally, clean the fixture and surrounding area to remove dust and fingerprints, allowing you to fully enjoy your stylish update. Taking these steps ensures your new pendant lamp is both safe and stunning, creating a cozy, inviting space.
Frequently Asked Questions
How Do You Update Outdated Light Fixtures?
Updating outdated light fixtures is simple and transforms your space. First, turn off the power at the breaker. Then, remove the old fixture carefully, disconnecting the wires. Connect the new pendant lamp’s wires to the existing wiring, following safety guidelines. Once secured, mount the fixture and turn the power back on. Choose a style, like boho pendant lamps, that matches your decor to give your room an instant refresh.
Can a Can Light Be Changed to a Pendant Light?
Think of your ceiling like a stage—can lights are the spotlight, but a pendant is the chandelier. Yes, you can change a can light to a pendant. You’ll remove the trim, install a retrofit kit that connects to the existing box, and hang your pendant at the perfect height. Just make sure the electrical box supports the weight, and follow the manufacturer’s instructions for a safe, stylish upgrade.
Can You Just Change the Shade on a Pendant Light?
You can often change the shade on a pendant light if it’s designed with a removable or replaceable shade. Make sure the new shade matches the fixture’s size and attachment method, and that the wiring and socket can handle the weight. Always turn off the power before swapping shades, and check the manufacturer’s instructions to verify compatibility. Proper fitting guarantees safety and a fresh look without replacing the entire fixture.
How Do You Change a Light Fitting Pendant?
Changing a pendant light fitting is like rewriting your home’s story. First, turn off the power at the breaker, then carefully remove the old fixture. Connect the new pendant’s wires—hot to hot, neutral to neutral, ground to ground—secure with wire nuts. Attach the mounting bracket, adjust the chain or cord length, and screw in the bulb. Finally, restore power and enjoy your refreshed space.
Conclusion
As you illuminate your space with your new boho pendant, remember that lighting isn’t just about brightness—it’s about setting the mood and telling your story. Like a lighthouse guiding ships home, your carefully chosen fixture can lead your room to a place of warmth and style. Embrace this upgrade as a symbol of your personal touch, and let your space shine with the effortless charm and soul of boho design.